AJPX Desk Manual
A complete guide to the platform: what each screen does, which emails send themselves, and how the three AI assistants work.
1. Getting Started
AJPX Desk is the first module of the Fidelu platform. Access it at ajpxdesk.ajpxolutions.com.
Signing in
- Continue with Google — one-click sign-in if you use Gmail/Google Workspace.
- Email and password — with a "Forgot password" link if you need it.
- Choosing what you'll use: after creating your account you pick AJPX Desk (tech support), the CRM (sales and customers) or both, and start a 30-day free trial with no credit card. You can change it any time from Settings → Modules.
- Automatic sign-out: after 15 minutes of inactivity, with a 60-second warning first.
Moving between sections (tabs)
- Single click on a sidebar item replaces the current screen — the app's usual behavior.
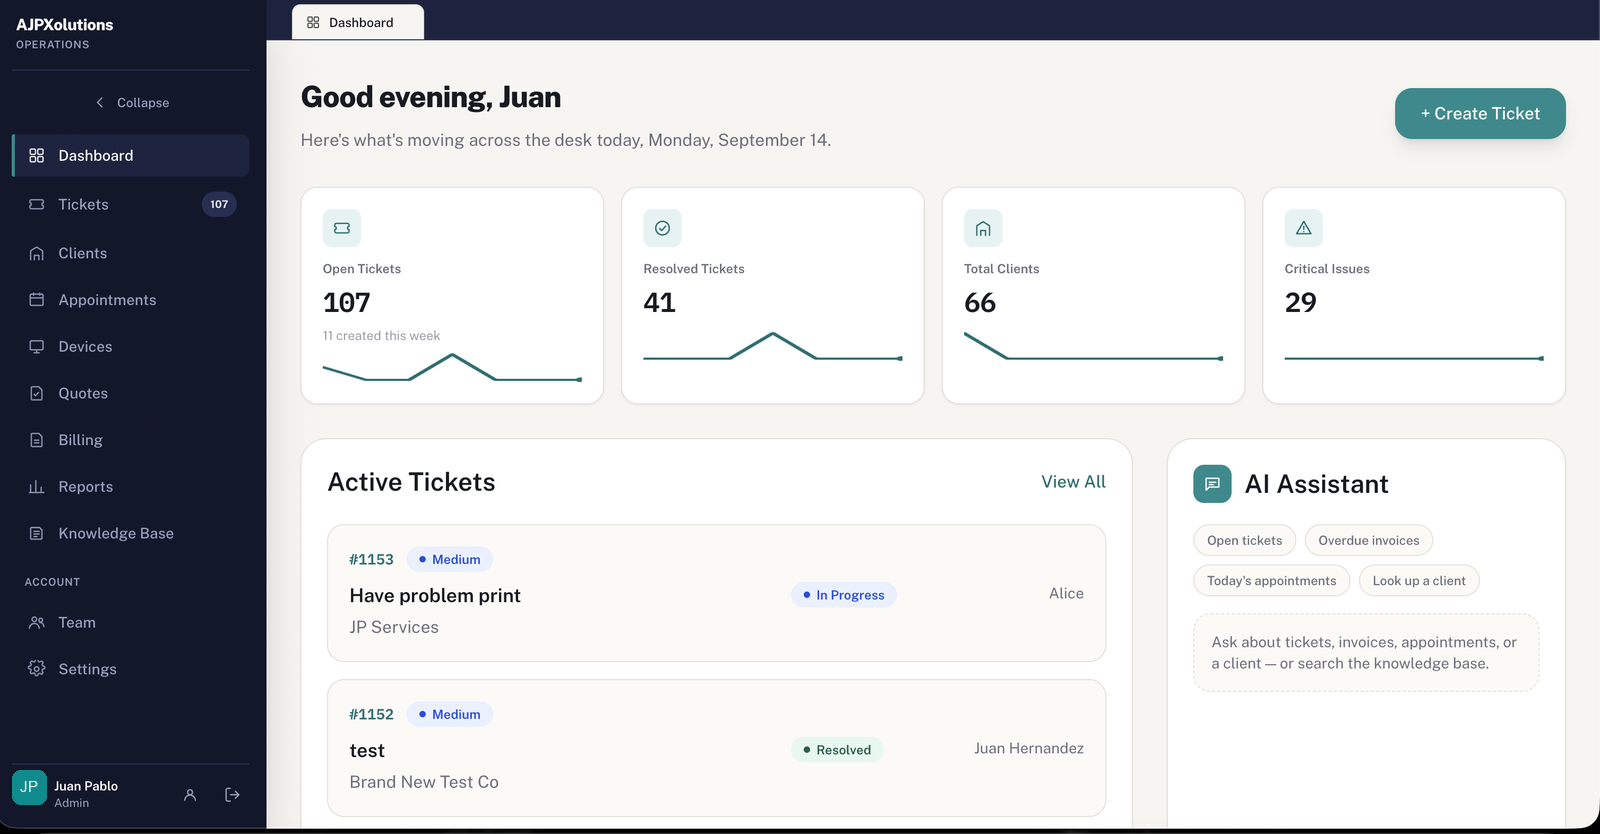
- Double-click on a sidebar item opens that section as a new tab, just like a browser — for example, to keep an invoice open in Billing and a client open in Clients at the same time. Tabs appear right below the top bar (you can see one in the Dashboard screenshot below).
- Close a tab with its ✕. A colored dot next to its name means that tab has an unsaved form, even after you've switched away.
- If a section is already open in another tab, clicking or double-clicking it just brings that tab to the front — it's never opened twice.
2. Dashboard
The first thing you see when you sign in: a snapshot of today's operation.
What's here
- 4 stat cards — Open Tickets (with how many were created this week), Resolved, Total Clients, Critical Issues.
- Active Tickets — the most recent ones, with a direct link to "View All".
- + Create Ticket — jump straight into a new ticket without leaving the Dashboard.
- AI Assistant — ask about tickets, invoices, appointments, or clients without leaving the Dashboard (see Section 15).
3. Tickets
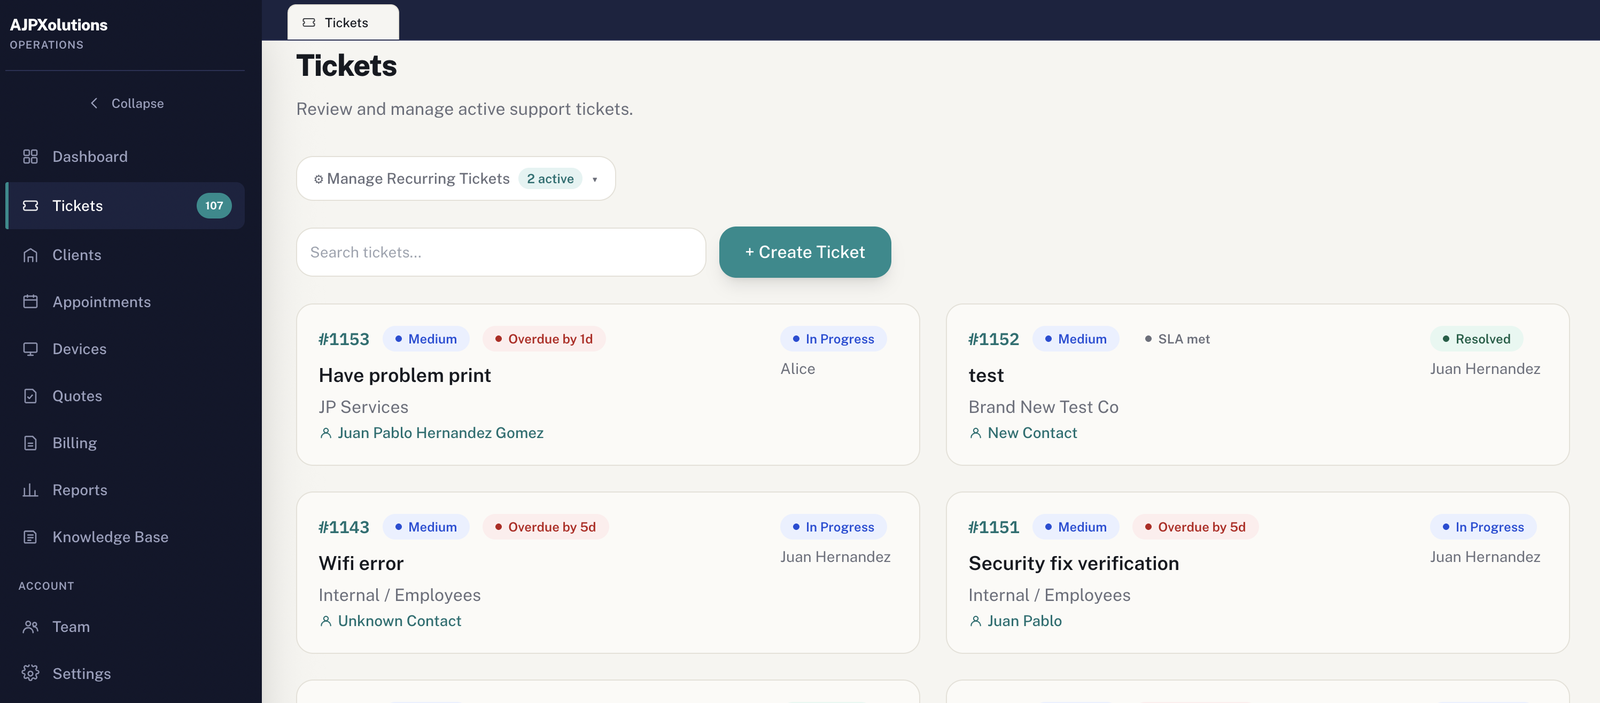
The heart of the operation: every support request, from creation to resolution.
What you can do
- Create a ticket — client, contact, issue, description, category, priority, attachments, and custom fields.
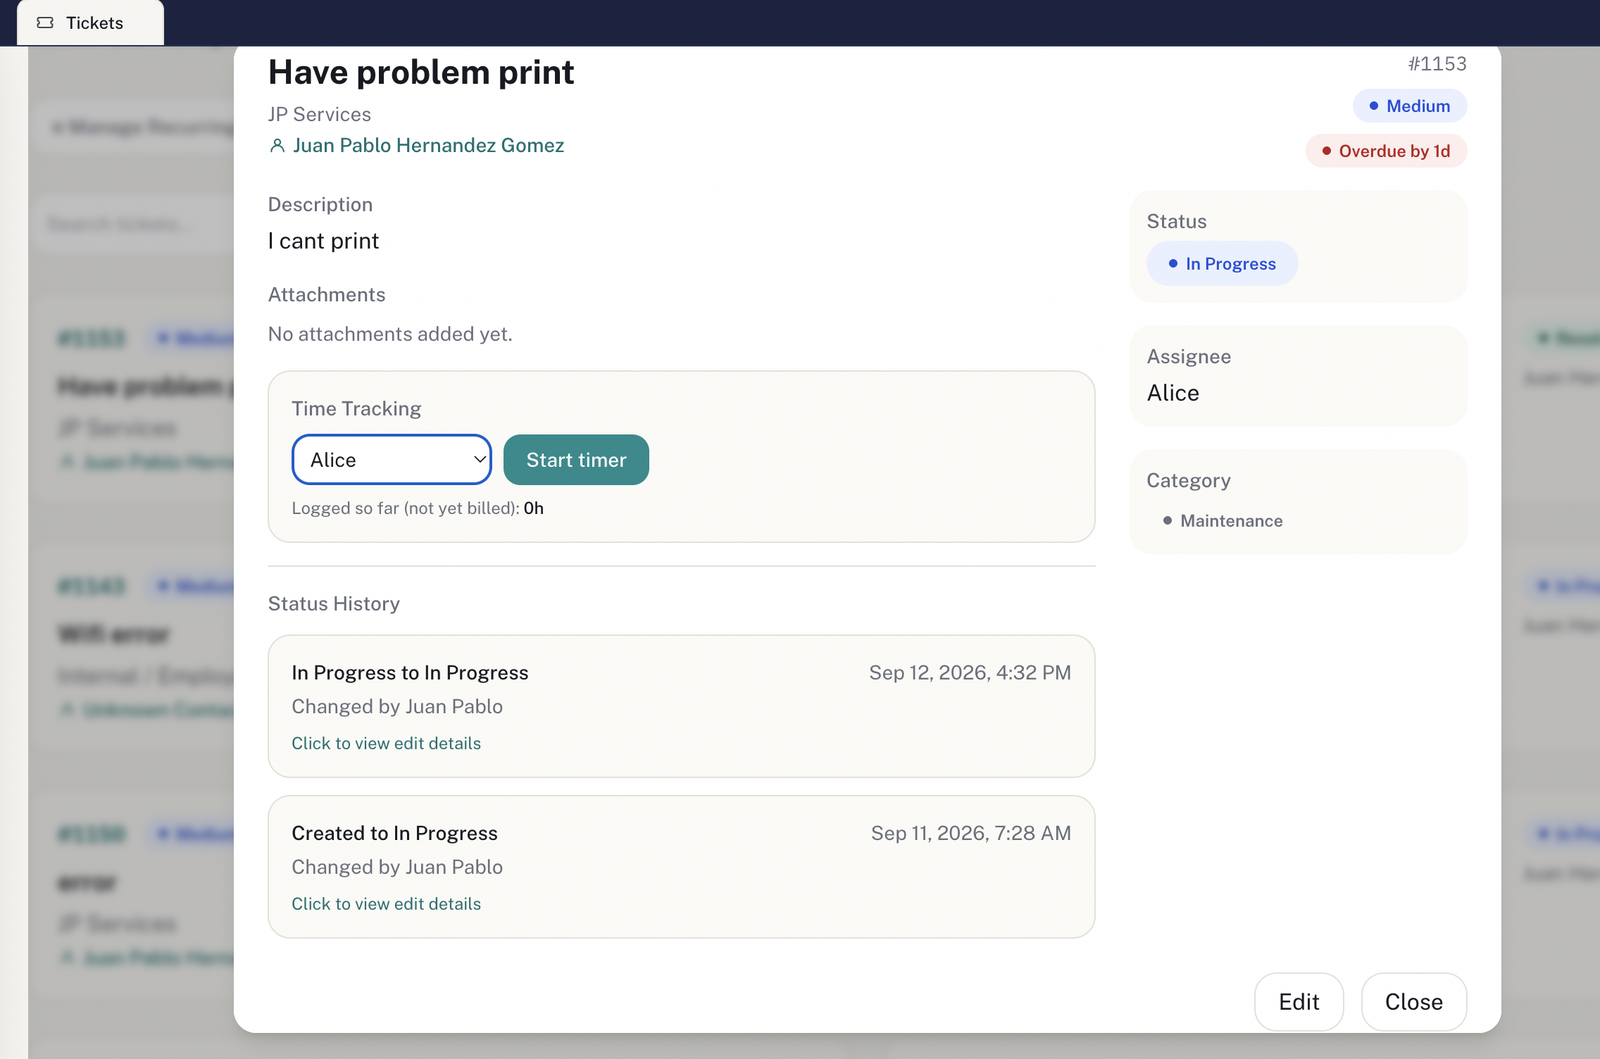
- Change status/priority/assignee — every change lands in the Status History with a timestamp and who made it.
- Internal comments — with quick-insert macros (canned responses configured in Settings).
- Time tracking — start the timer per technician; unbilled time shows as "Logged so far (not yet billed)".
- SLA badge — shows whether the ticket is on time, at risk, or overdue ("Overdue by Xd").
- Recurring tickets — "Manage Recurring Tickets" for tasks that repeat (e.g. monthly maintenance).
- Email-to-ticket — an email to your account's support address automatically creates or comments on a ticket.
4. Clients
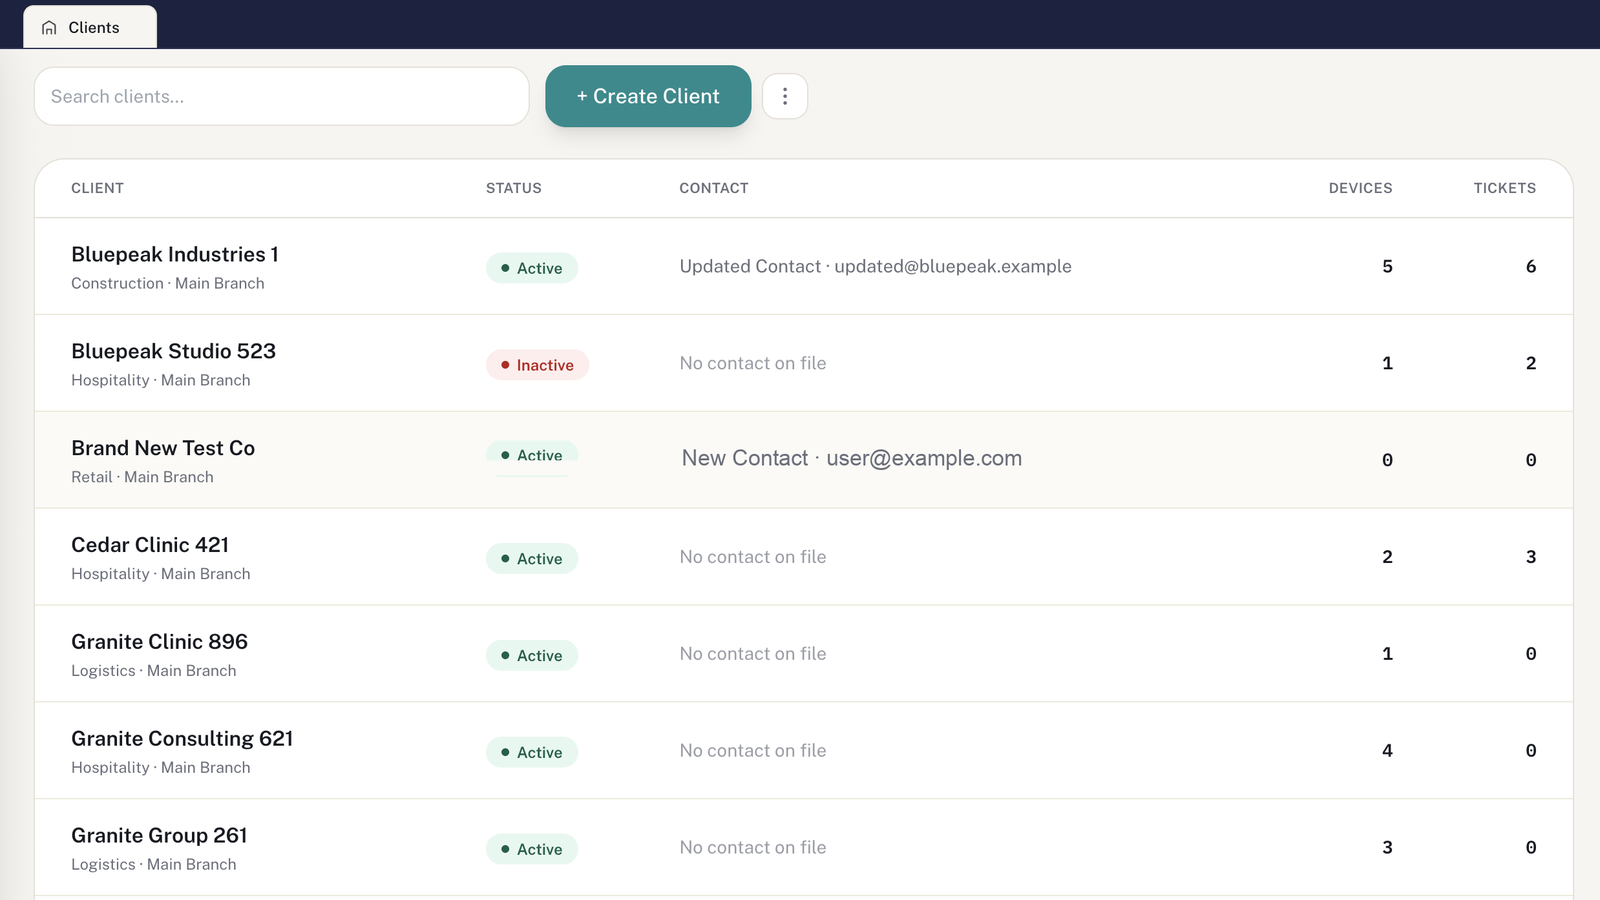
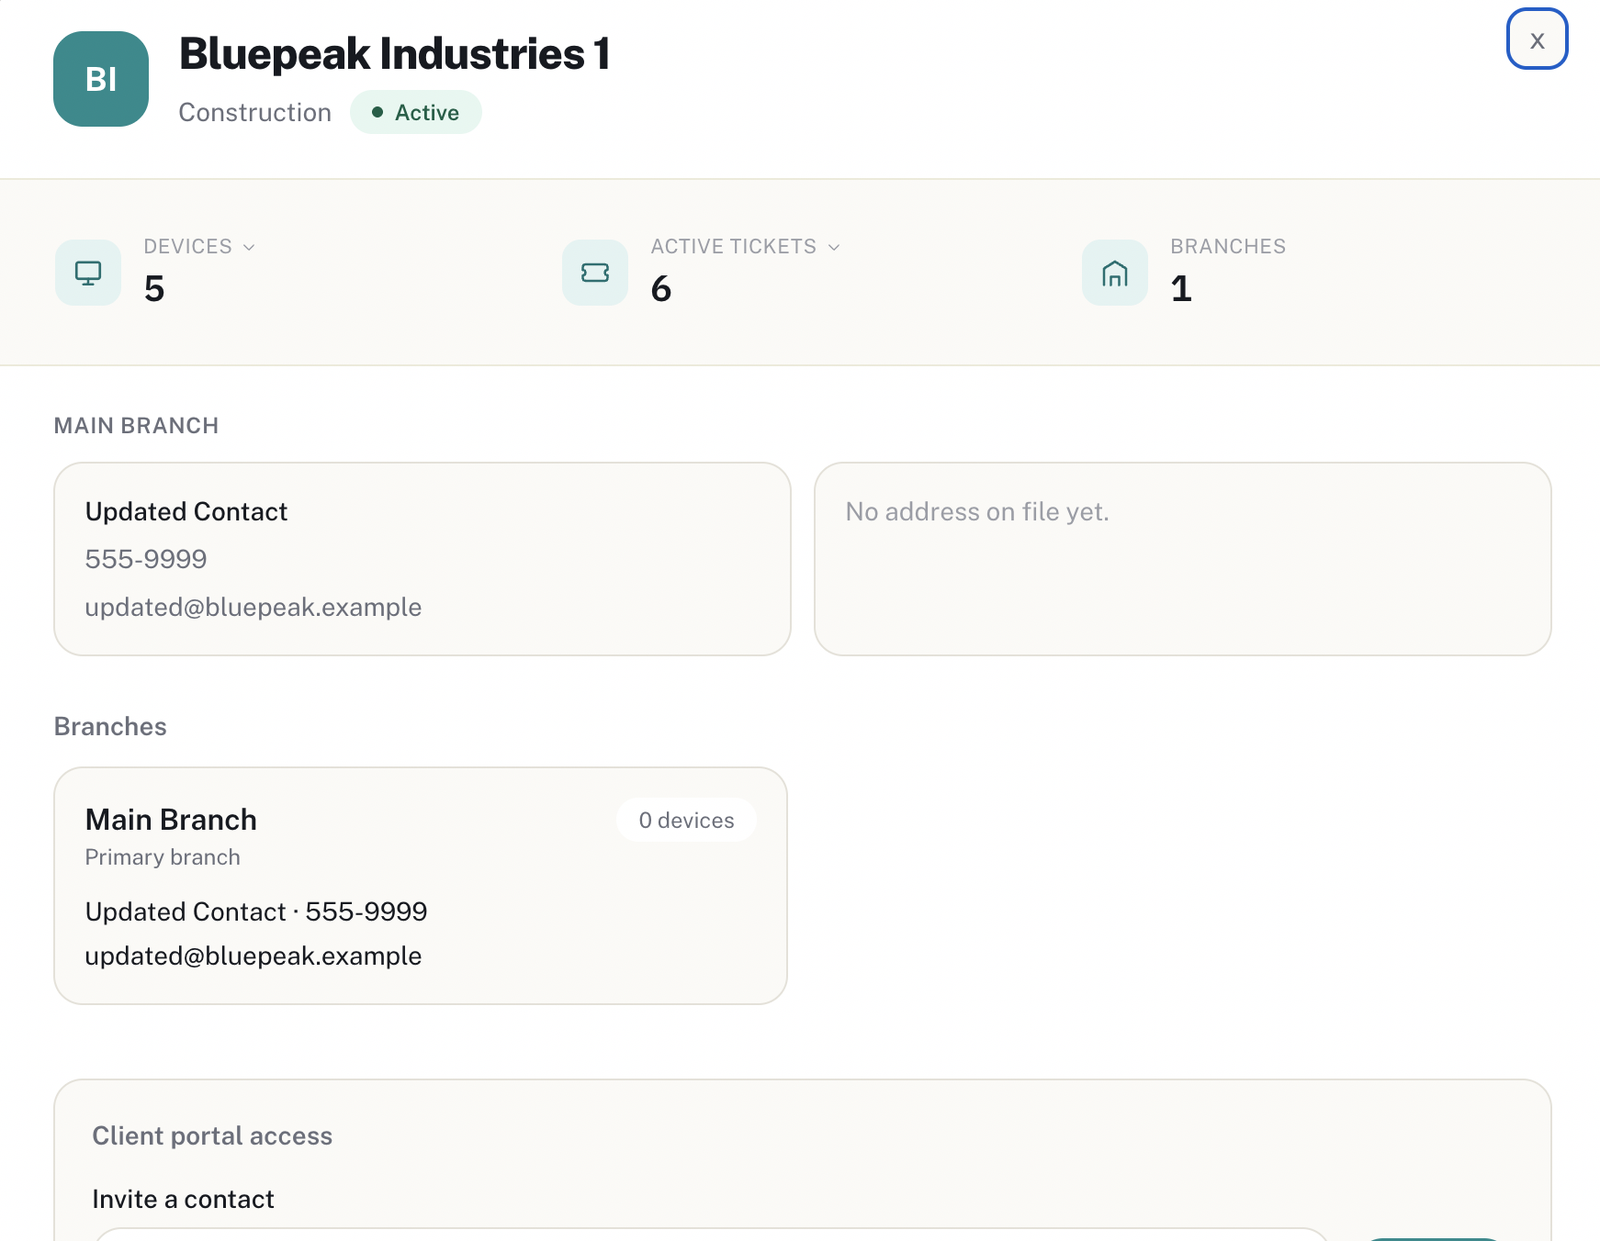
The record of every client, their branches, and the access you grant them to the Client Portal.
What you can do
- Create/edit clients, with multiple branches per client.
- Bulk import via CSV — to onboard many clients at once.
- Invite to the Client Portal — from the client's detail view, "Client portal access" section. You can cancel a pending invite.
- See that client's devices and active tickets right from their profile.
5. Appointments
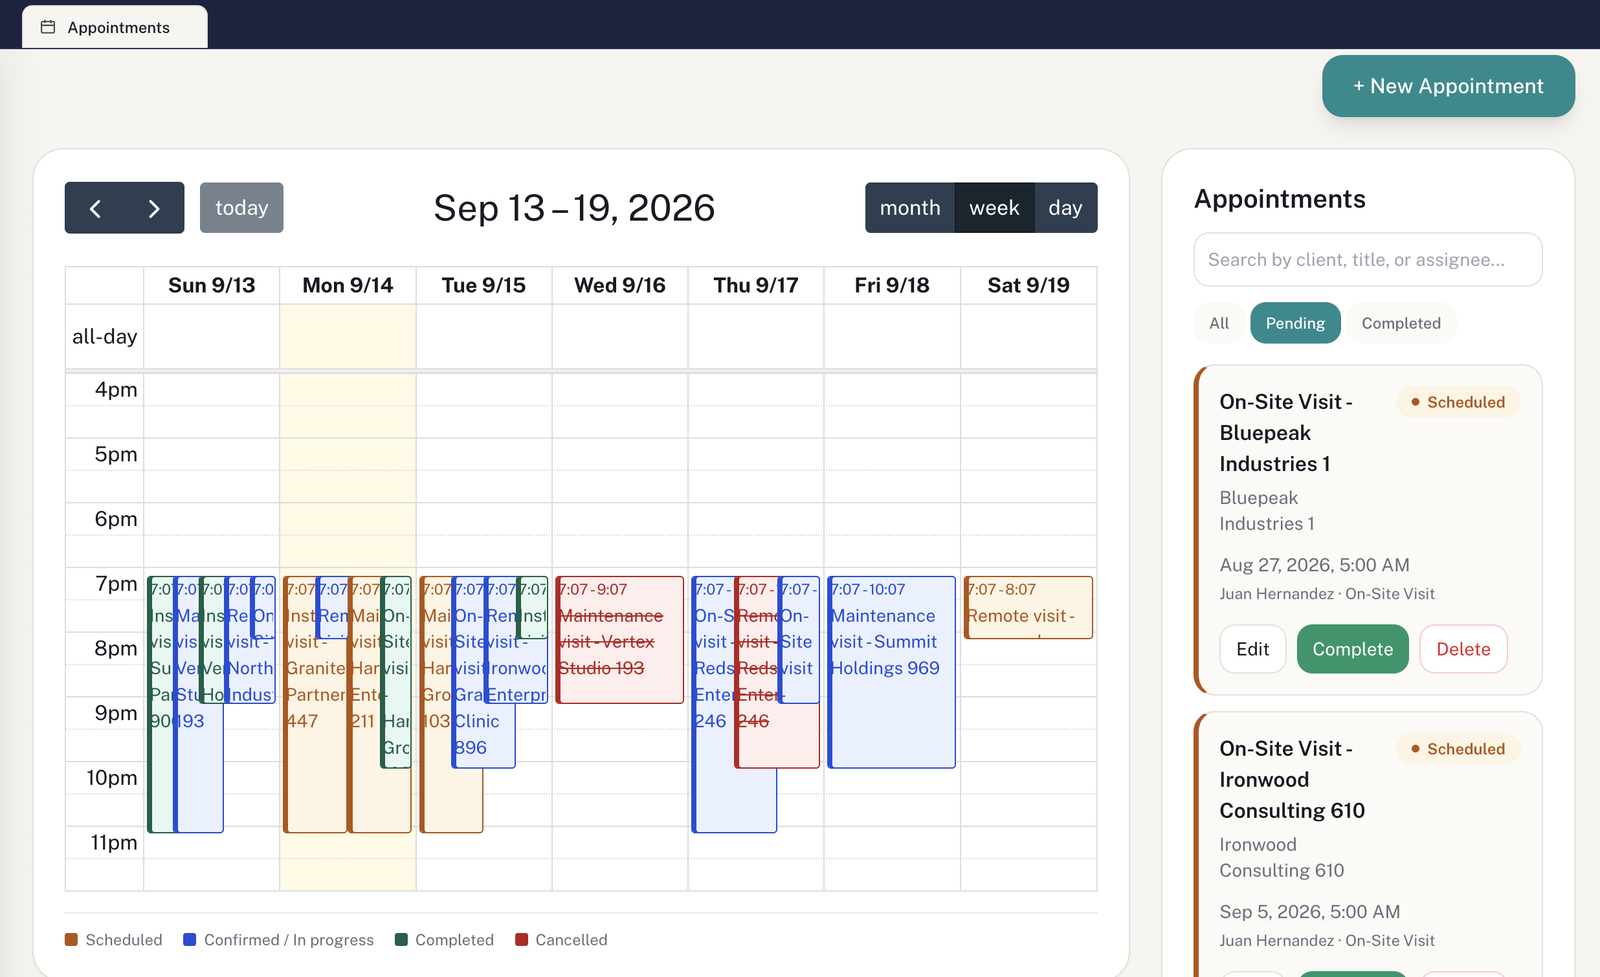
A calendar of service visits and appointments, with an automatic reminder 24 hours ahead.
What you can do
- Create/edit appointments; view by month, week, or day.
- Mark as Completed or delete it.
- Filter between All / Pending / Completed.
- Color coding shows status: Scheduled, Confirmed/In Progress, Completed, Cancelled.
6. Devices
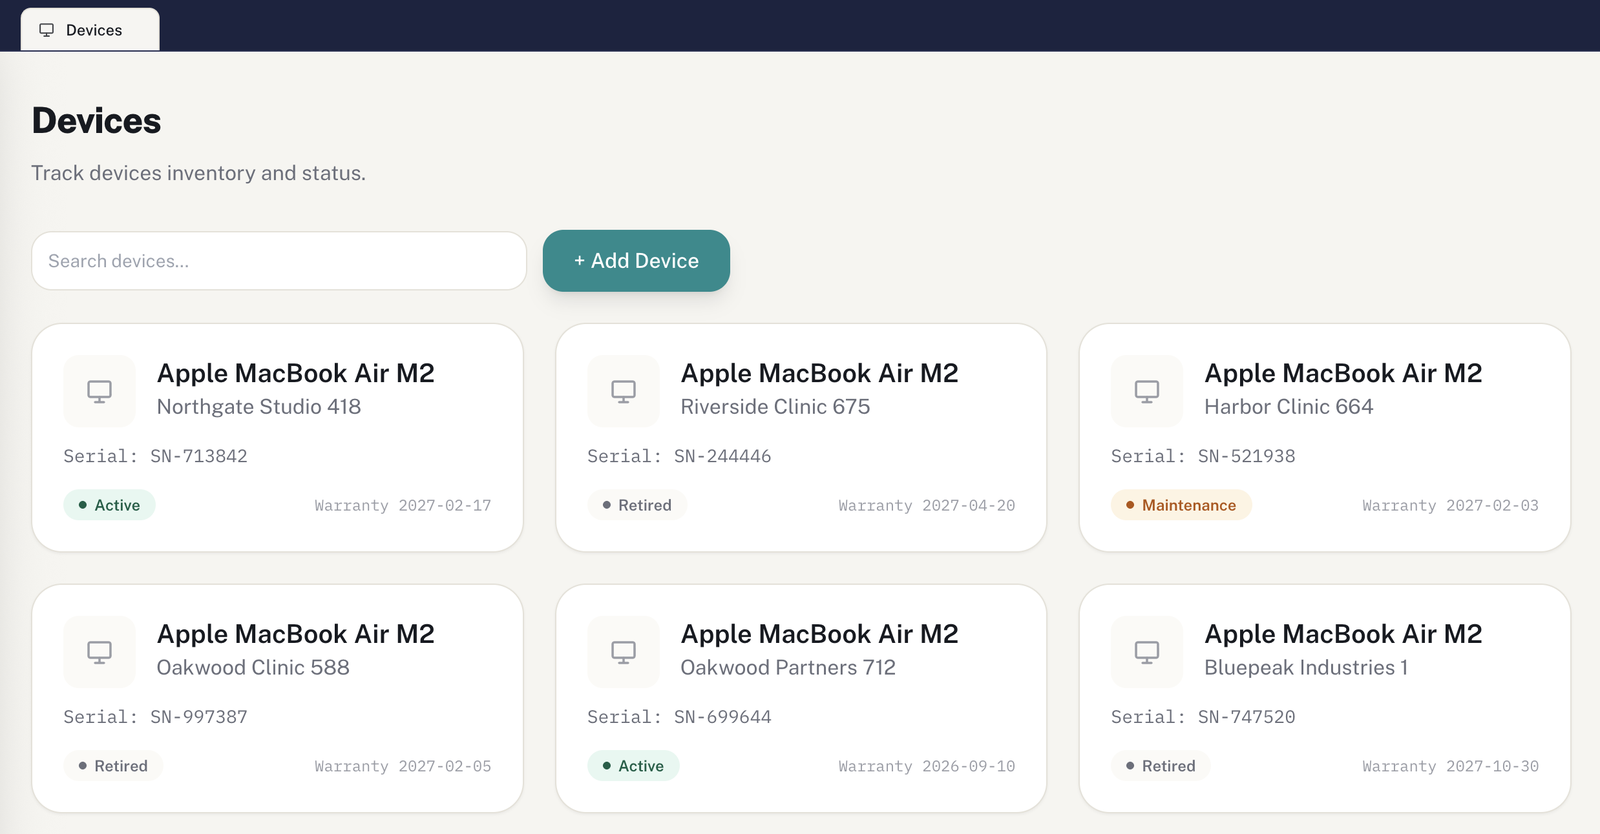
An inventory of your clients' devices: what they have, where, and in what condition.
What you can do
- Register a device: type, serial number, warranty, and which client/branch it belongs to.
- Change its status (Active, Maintenance, Retired).
- Search and filter by status.
7. Quotes
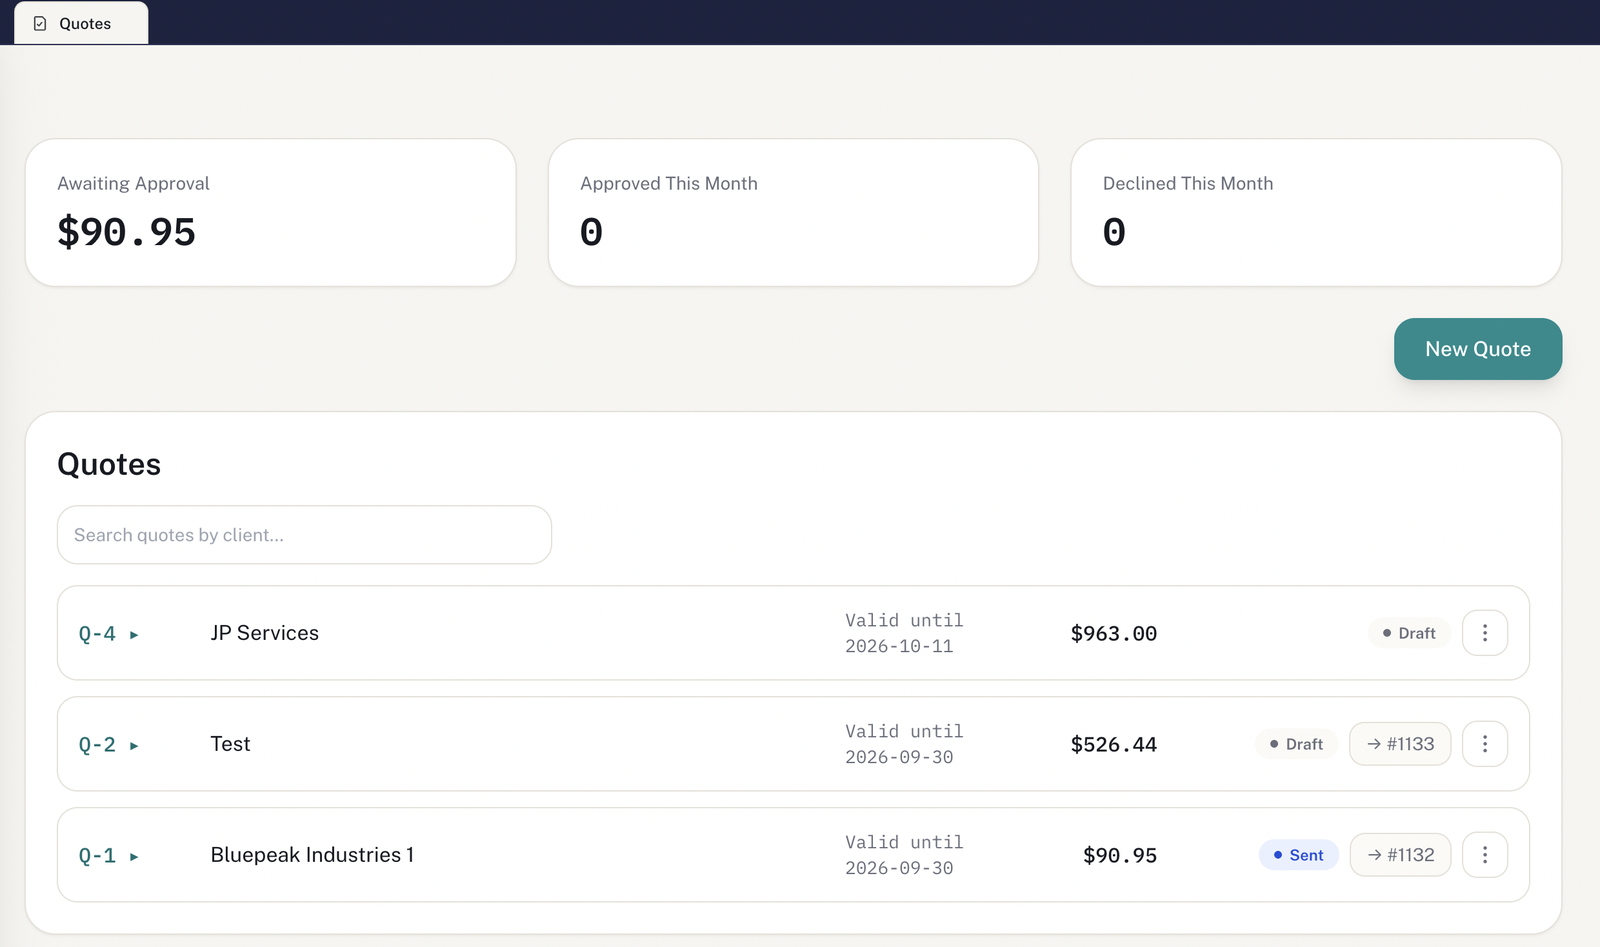
Quote before you bill — then turn it into a ticket in one click once the client approves.
What you can do
- Create a quote with line items, discount, and tax.
- Send it to the client — they approve or decline it from their Portal (their only write action there, besides chat).
- Convert an Approved quote into a ticket directly (the "→ #ticket" column).
8. Billing
Manual invoices, or ones generated from resolved tickets or recurring charges.
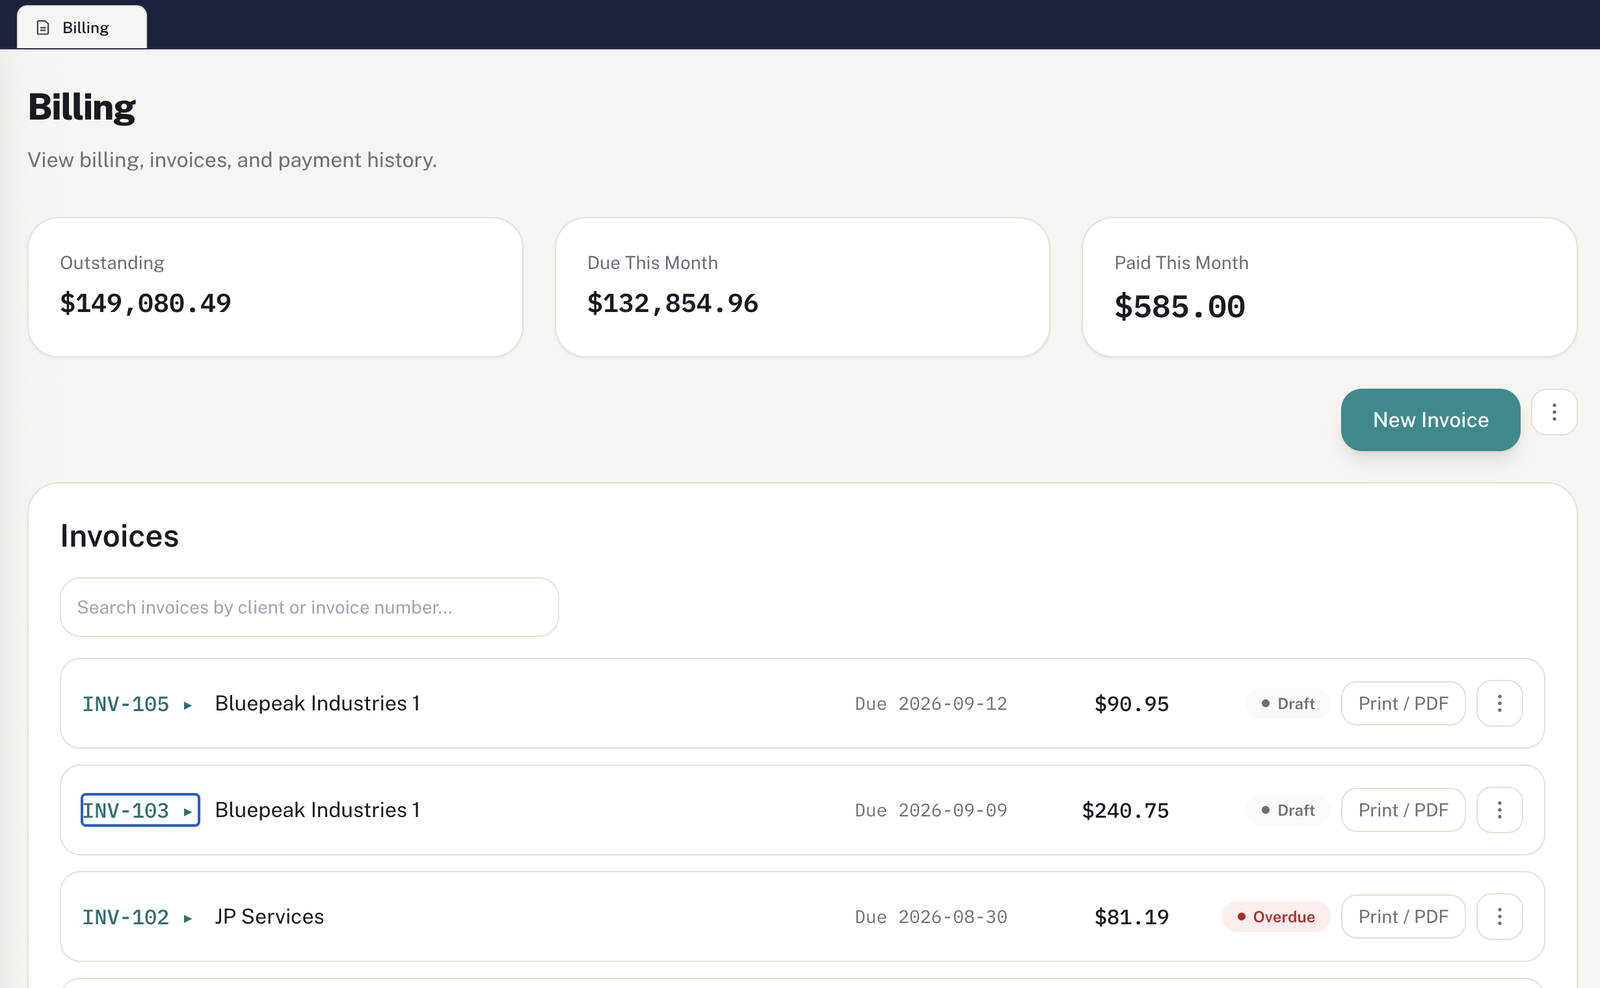
What you can do
- New invoice — manual, from a resolved ticket, or from a recurring charge.
- Send the invoice by email, mark it paid, or print/export to PDF.
- Manage your own subscription (Stripe) from the same section.
9. Reports
Every module, in one filterable view by date range and free-text search.
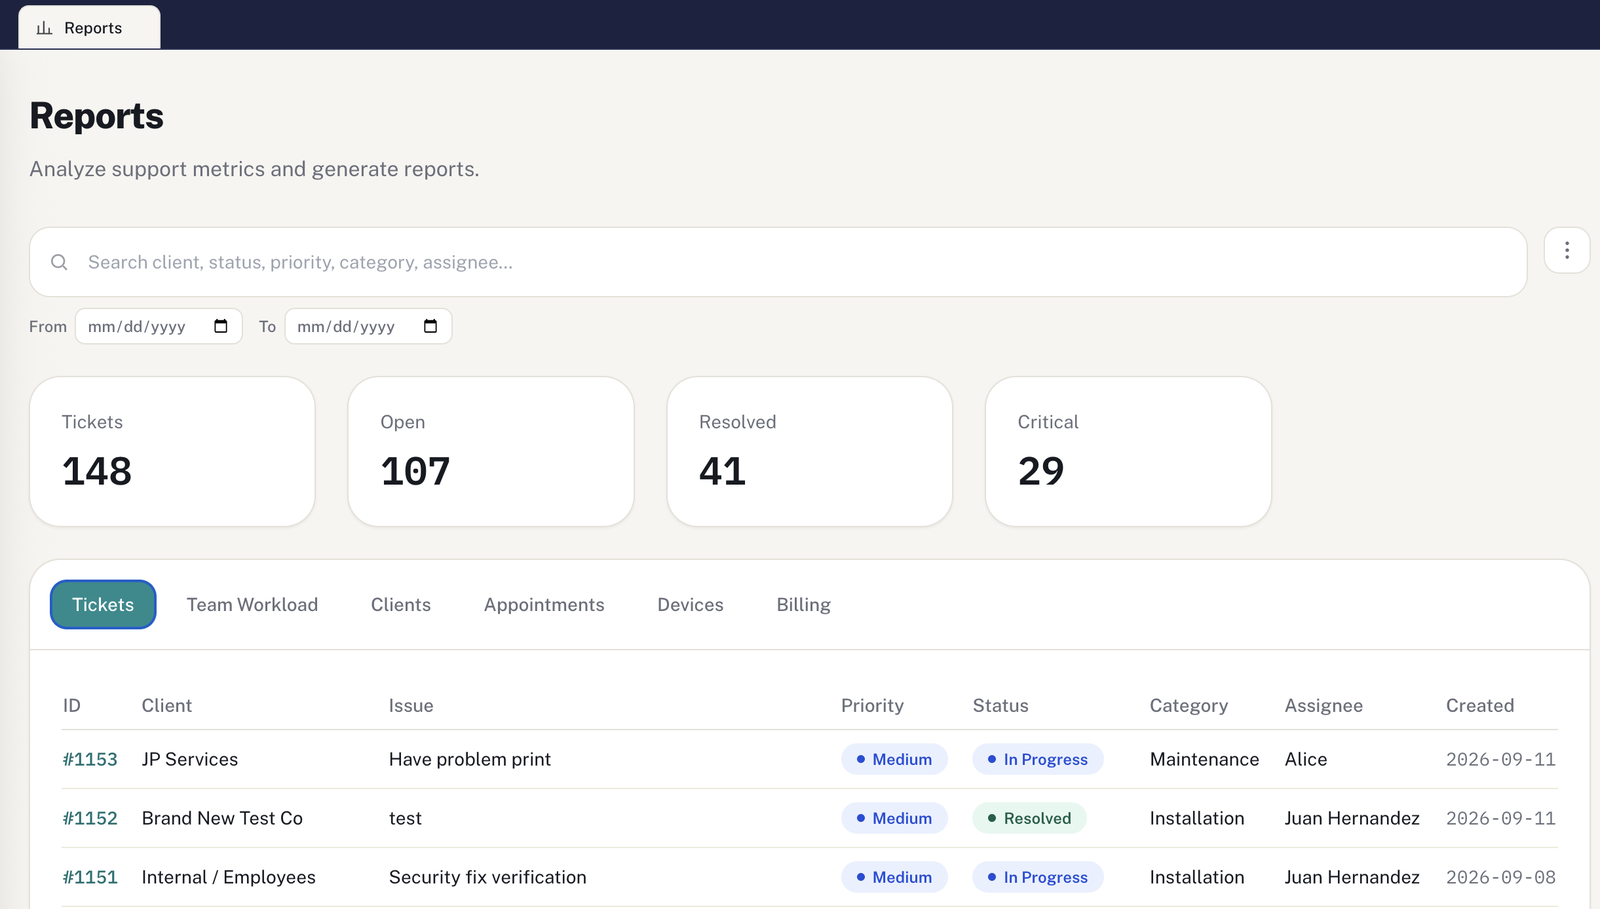
What you can do
- Filter by date range and text (client, status, priority, category, assignee).
- Switch between tabs: Tickets, Team Workload, Clients, Appointments, Devices, Billing.
- Export to CSV or print.
10. Knowledge Base
Help articles your clients can read on their own — and that power the AI assistants.
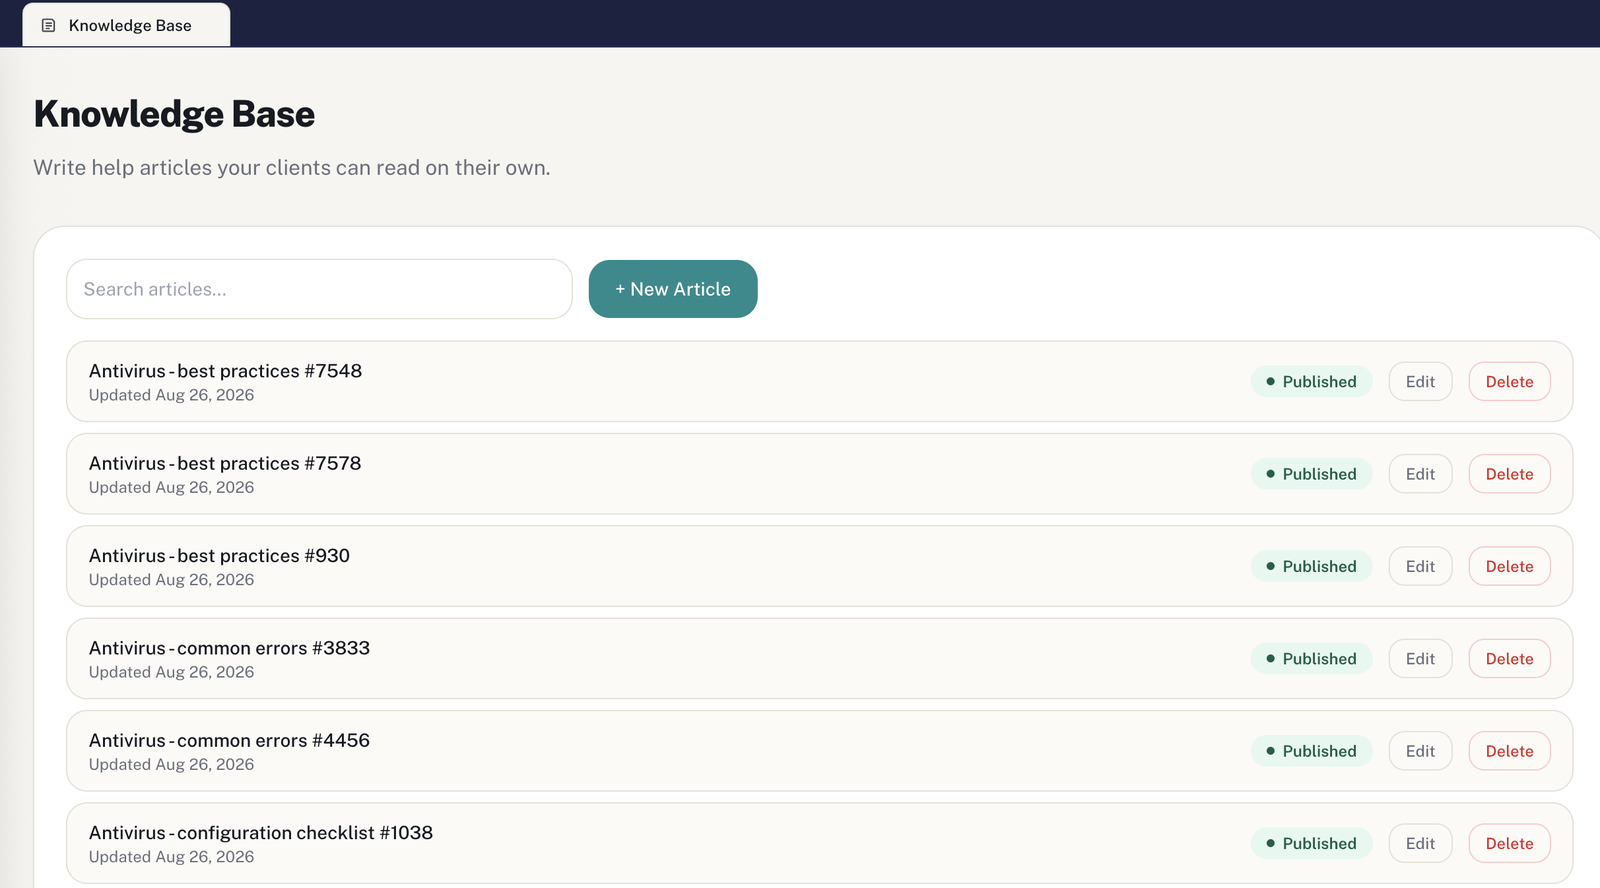
What you can do
- Write/edit/delete articles.
- Draft vs. Published — a Draft article is staff-only; Published is also visible to the client and the portal chatbot.
11. Team & Permissions
Who at your company has access, and what each person can see or edit.
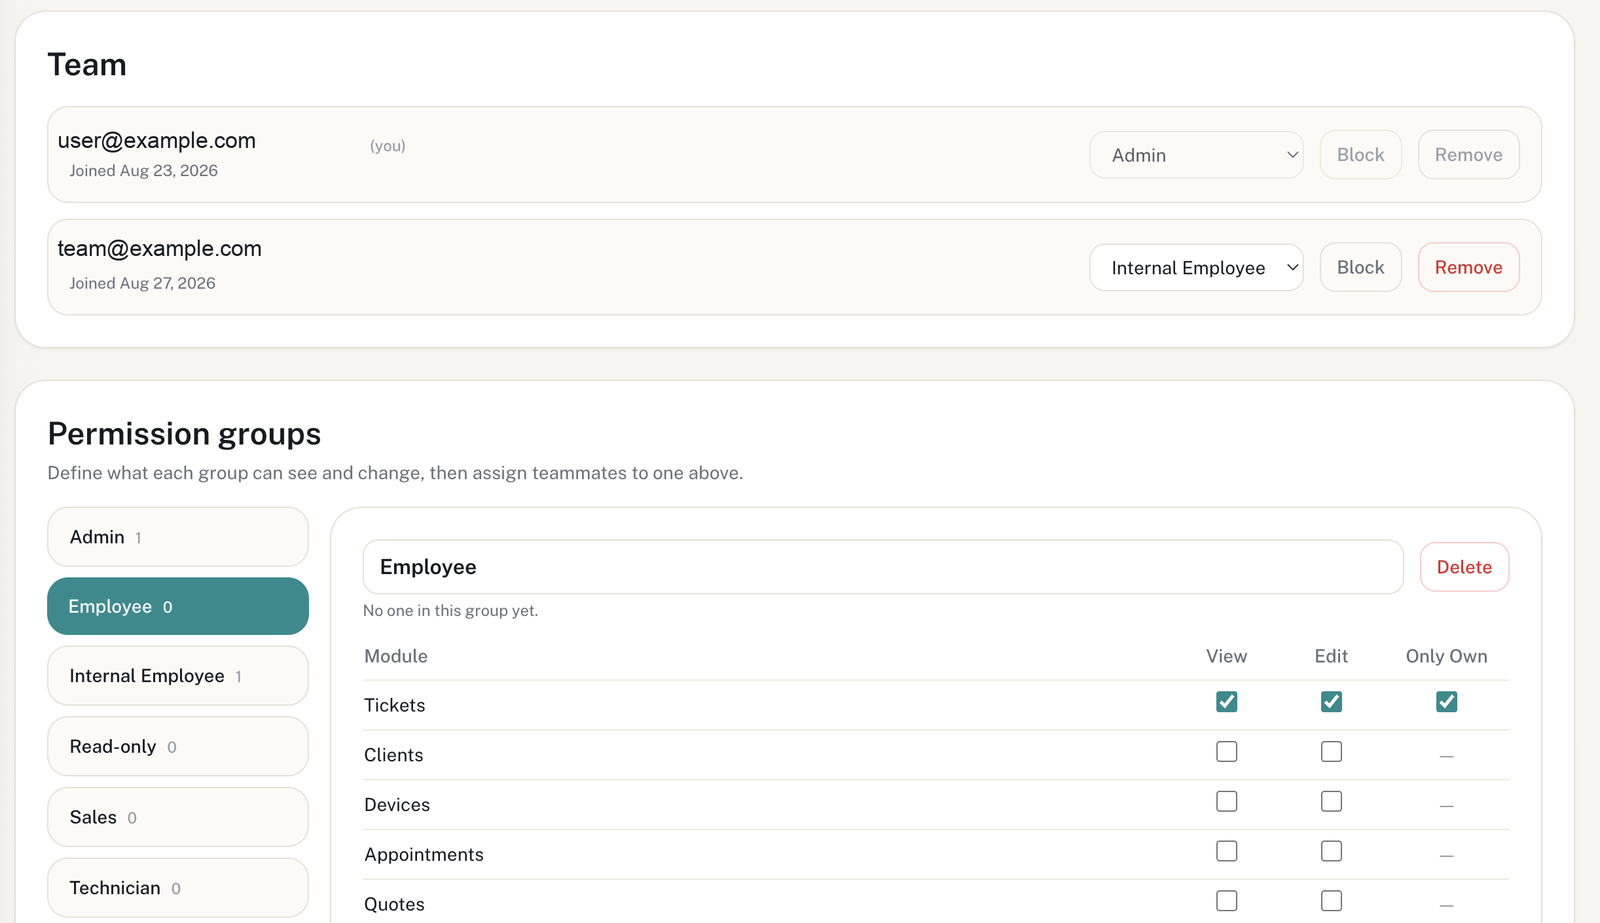
What you can do
- Invite by email (not by link) to add a new team member.
- Assign a role: Admin or a custom Permission Group.
- Build permission groups with fine-grained control per module: View, Edit, and "Only Own" (e.g. a technician who only sees their own tickets).
- Block or remove a member; these changes are logged in an audit trail.
12. Settings
This is where you tune how the whole app behaves for your company.
Modules
Turn AJPX Desk and the CRM on or off. Each is billed on its own ($29 and $19 a month, 1 user included; $10 per extra user; 10% off with both). Turning one off keeps it active until the end of the period you paid for, and your data is kept.
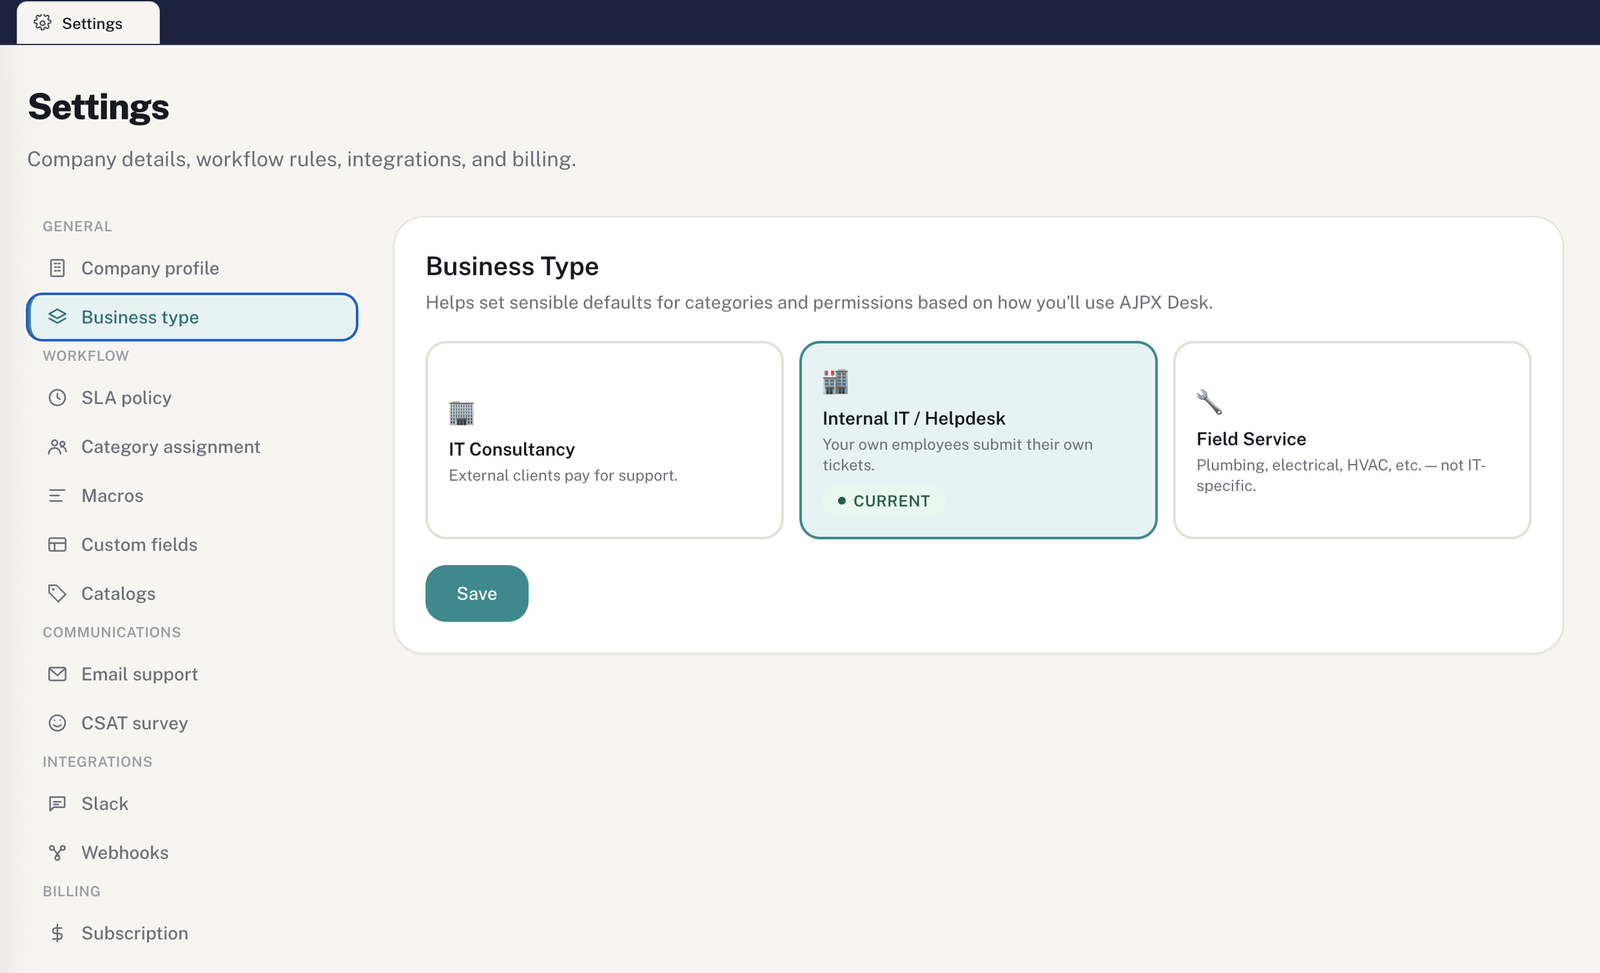
Business Type
IT Consultancy, Internal IT/Helpdesk, or Field Service — reshapes the app's vocabulary for your kind of business.
SLA Policy
Target hours per priority — this is where each ticket's SLA badge comes from.
Macros
Canned responses you can quickly insert into ticket comments.
Custom Fields
Add your own fields to Tickets, Clients, or any module that supports them.
Email Support
Your account's inbound address that turns incoming emails into tickets.
Catalogs
Edit the values behind statuses, priorities, and other dropdown lists.
CSAT Survey
Turn the satisfaction survey sent on ticket resolution on or off.
Slack / Webhooks
Connect key app events to a Slack/Teams channel or to Zapier/Make/n8n.
Subscription
Free-trial days left, your monthly total by module and user, and the button that opens the payment portal.
13. Your Account
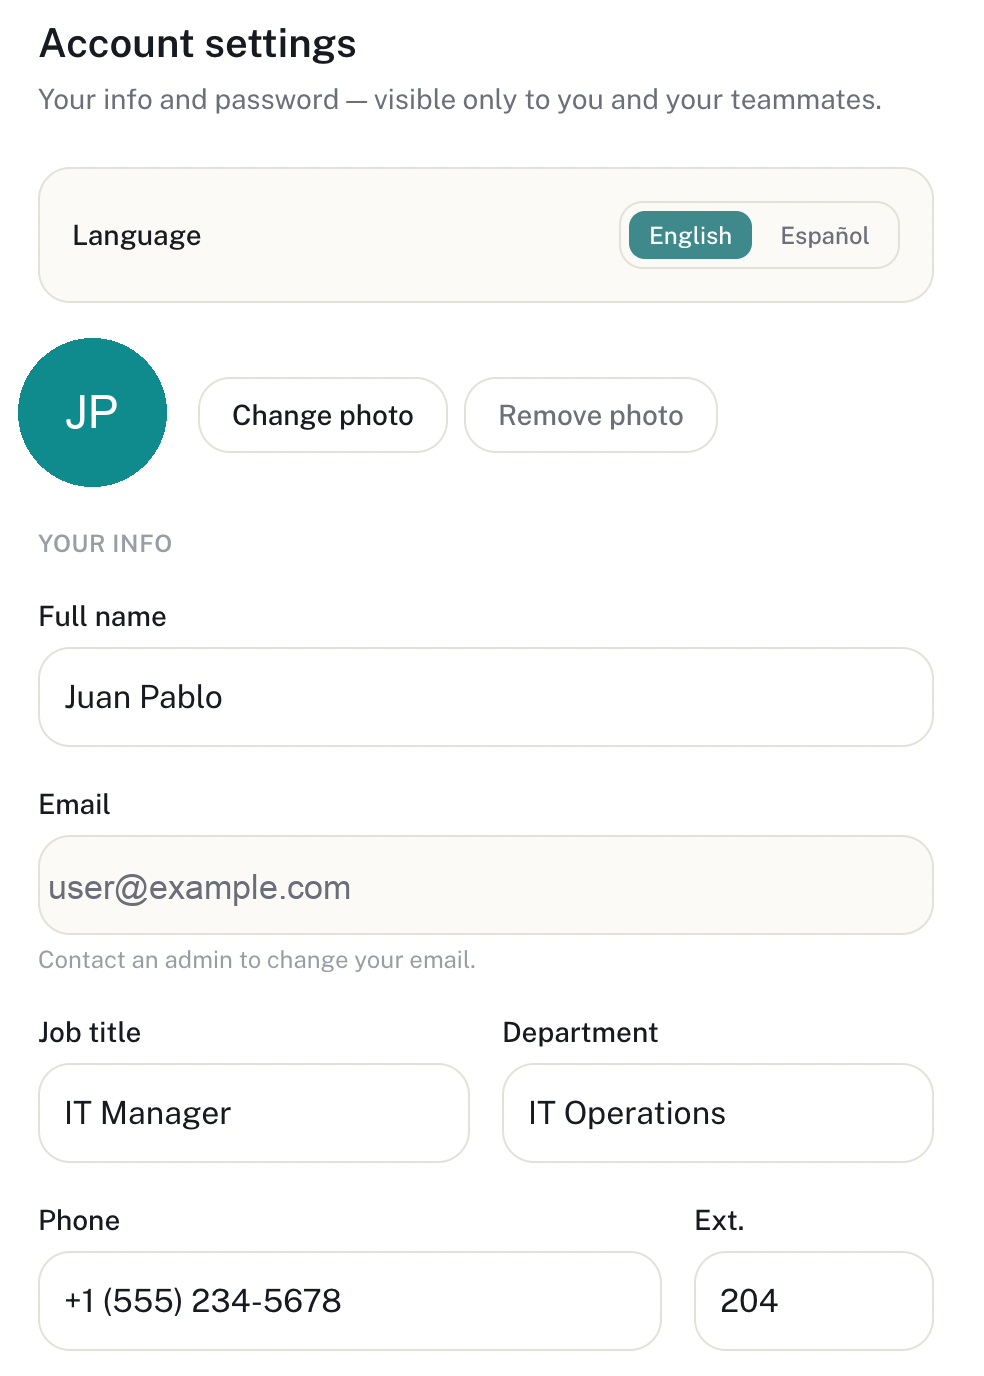
Opens by clicking your name, at the bottom left of the sidebar.
What you can do
- Change language (English/Español), photo, name, job title, department, and phone.
- Change your password (saved separately from your profile).
- Your sign-in email can only be changed by an Admin.
14. System Emails
Everything AJPX Desk sends by email on its own, without anyone typing a word.
| What triggers it | Who gets it | |
|---|---|---|
| Ticket created | Staff creates a ticket on the client's behalf | Client |
| Ticket status change | The ticket's status changes | Client |
| CSAT survey | The ticket is marked Resolved | Client (1–5 star survey) |
| Appointment status change | The appointment's status changes | Client |
| Appointment reminder | Automatic, 24h ahead | Client |
| Invoice sent | Staff clicks "Send Invoice" | Client |
| Overdue invoice | Automatic, daily, once past due | Client |
| Quote sent | Staff clicks "Send Quote" | Client |
| SLA breach | Automatic, hourly, once the deadline is crossed | All account admins (+ Slack/Teams if connected) |
| Slack/Webhook event | Key app events | Your own Slack/Teams or Zapier/Make/n8n |
| Inbound email → ticket | Someone emails your support address | Creates/comments a ticket; client gets an acknowledgment |
15. The 3 AI Assistants
It's not one chatbot — it's three, each with different access depending on who's asking.
Dashboard
For staff. Answers questions about live account data: ticket counts, overdue invoices, upcoming appointments, client lookups, and the Knowledge Base. It never writes anything, only reads.
Inside a ticket
Same read-only access as the Dashboard one, plus one extra tool: finding past resolved tickets similar to this one. Sees the full Knowledge Base, drafts included.
Client Portal
Only answers from that client's own published Knowledge Base articles and their own tickets/invoices/appointments — never another client's data. If it can't help, it asks the client to confirm and then automatically creates an escalation ticket.
16. The Client Portal
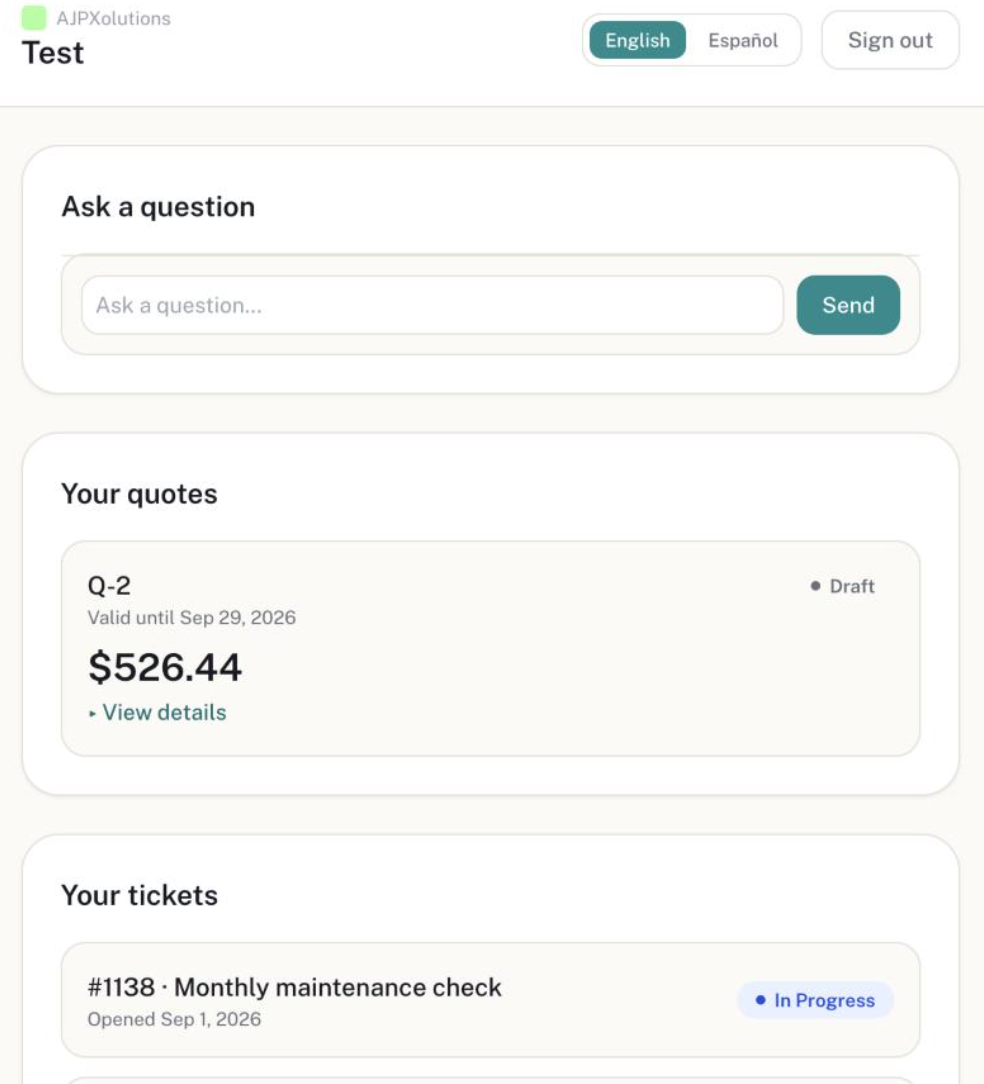
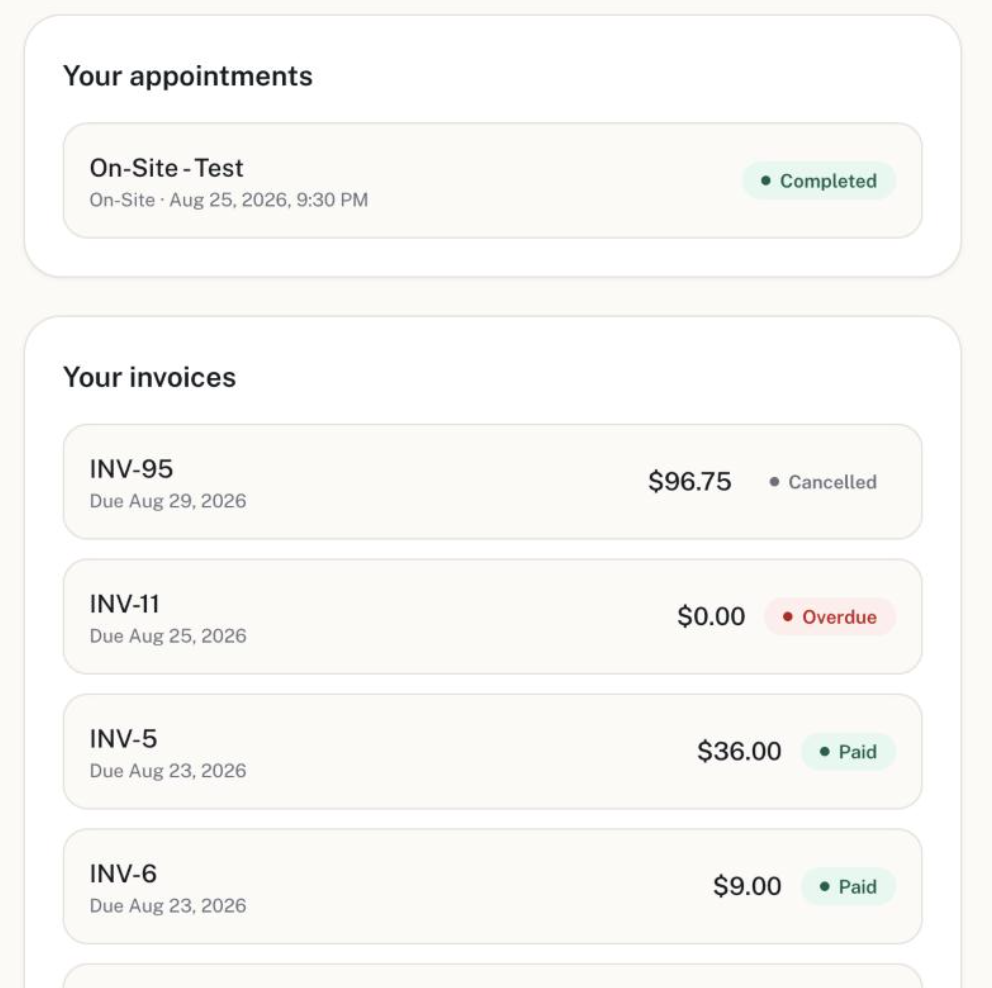
What your client sees once you invite them — a simplified, mostly read-only view.
What a client can do there
- View their own Tickets (status only), Invoices (amount, due date, status), Appointments, and published Knowledge Base articles.
- View a Quote's full line-item, tax, and discount breakdown, and Approve or Decline it — their only write action besides chat.
- Chat with the portal's AI assistant (see the section above).
- Switch language (EN/ES) and sign out.